In the dynamic world of IoT (Internet of Things), building a prototype to bring your ideas to life has never been more accessible.
Raspberry Pi, a credit-card-sized computer, is your key to unlocking a realm of possibilities for creating IoT prototypes.
In this blog post, we embark on a journey to explore how to build your own IoT prototype using Raspberry Pi, from concept to execution, with the aim of igniting your creativity and innovation.
Unveiling the Potential

Raspberry Pi is a compact, affordable, and versatile computing device that serves as an excellent foundation for your IoT prototype.
It offers GPIO (General-Purpose Input/Output) pins that enable you to interact with the physical world, making it a perfect choice for projects involving sensors, actuators, and data collection.
To harness Raspberry Pi’s power in your IoT prototype, familiarise yourself with its hardware specifications, available interfaces, and capabilities.
This understanding forms the bedrock of your innovative journey.
The Blueprint of Creativity
According to Springer, your IoT prototype begins with an idea. Define your project’s objectives, whether it’s a smart home automation system, environmental monitoring, or a wearable device.
Break down the functionality you envision and consider how Raspberry Pi can facilitate its realisation.
For instance, if you’re creating a smart plant monitoring system, consider integrating soil moisture sensors, cameras, and actuators to control watering.
This blueprint sets the direction for your project’s development.
Gathering the Building Blocks
Before diving into development, gather the necessary components that align with your prototype’s concept.
Raspberry Pi itself is a starting point, but additional components such as sensors, LEDs, motors, and connectors will shape your IoT experience.
Research and select components that are compatible with Raspberry Pi and fulfil your prototype’s requirements.
By assembling these building blocks, you’re ready to take your idea from concept to reality.
Assembling the Puzzle
Assembling your IoT prototype involves connecting the hardware components, writing code, and integrating functionalities.
Leverage Raspberry Pi’s GPIO pins to establish connections with sensors and actuators, enabling data exchange.
Use programming languages like Python to write code that reads sensor data, triggers actions, and communicates with other devices through networking protocols like MQTT (Message Queuing Telemetry Transport).
This fusion of hardware and software transforms your idea into a tangible creation.
Code Craftsmanship
Rietta.com says programming Raspberry Pi for your IoT prototype requires a fusion of creativity and precision.
Write code that interprets sensor readings, processes data, and commands actuators.
Consider implementing error handling, data validation, and communication protocols to ensure seamless operation.
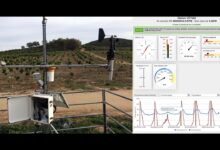
For example, in a weather station prototype, Python code could retrieve data from a temperature and humidity sensor and display it on an LCD screen while sending updates to a cloud platform for remote access.
Elevating the Experience
A well-designed user interface and remote access enhance the usability of your IoT prototype.
Develop a simple yet intuitive interface to visualise data and control actions.
Web development frameworks like Flask can assist in creating web-based dashboards.
Moreover, enable remote access to your prototype using SSH (Secure Shell) or cloud platforms.
This allows you to monitor and control your IoT device from anywhere, expanding the reach of your innovation.
Okay guys, now let us look into some frequently asked questions (FAQs) about How to build your own IoT prototype with Raspberry Pi.
How can I build my own IoT prototype using Raspberry Pi?
To create an IoT prototype with Raspberry Pi, start by selecting sensors, programming in Python, setting up the Raspberry Pi, and connecting to an IoT platform for data visualisation.
Do I need extensive technical knowledge to build an IoT prototype?
While some technical familiarity helps, Raspberry Pi’s user-friendly resources and online tutorials make IoT prototyping accessible to beginners and experienced makers alike.
What can I achieve with an IoT prototype built on Raspberry Pi?
You can develop a wide range of IoT projects, from smart home devices and environmental sensors to wearable gadgets and automation systems, all tailored to your creative ideas.
How can I make my Raspberry Pi IoT prototype scalable for future projects?
Design modular and flexible code, utilise open-source libraries, and document your project thoroughly.
This approach ensures your prototype serves as a foundation for future IoT innovations.
Conclusion
Building your own IoT prototype with Raspberry Pi is a journey of innovation and creativity.
From understanding Raspberry Pi’s role in IoT to defining your prototype’s concept, assembling components, writing code, and crafting a user-friendly interface, each step contributes to a unique and impactful creation.
In this era of rapid technological evolution, Raspberry Pi empowers you to transcend boundaries and transform ideas into reality.
By immersing yourself in the world of IoT and Raspberry Pi, you’re not just building a prototype—you’re nurturing a culture of innovation that embraces the limitless possibilities of connected devices.
As you embark on your IoT journey, remember that innovation is the heart of progress.
Embrace challenges, iterate on your ideas, and create prototypes that inspire, disrupt, and revolutionise.
With Raspberry Pi as your ally, the IoT landscape is yours to explore, shaping the future through your ingenuity and passion.


